A generous neighbor gave me some rhubarb, usually I would make rhubarb crisp but there wasn’t enough for that. What to do? I have strawberries, I could make strawberry rhubarb pie! I’ve never made a pie before so I turn to the trusty Internet for recipes.
I said already I have never made pie crust before. My mom doesn’t make pie crust, she always buys it because she says hers turns out more like cardboard. I watched my great grandma make pie crust once or twice, but that was a long time ago. Everyone tells me that making pie crust is hard. So I was nervous to try it.
I forgot to take a picture before we devoured the pie, but it turned out perfectly!! The crust was delicious and the perfect texture. I will never search for another pie crust recipe again, this is the one I will use forever more. The pie recipe was also very good, easy to follow and delicious.
So, some of you are going to think I’m crazy, and maybe I am. We made Dandelion Pancakes today. With actual dandelion petals in them. How did this happen?!
It all started when I was listening to an interview that John Gallagher from learningherbs.com did with Aviva Romm entitled Outdoor Kids. I tried to find a link for you but I couldn’t find it. If I find it I will add it here.
In the interview Aviva mentioned making dandelion pancakes with her kids. I was thinking “We have a yard full of dandelions, maybe we should make dandelion pancakes, I’ll never get my kids to go for it.” So I say to the kids, “Hey kids, should we make dandelion pancakes?” and they all said “Yes!!” (What?! that was not the reaction that I expected at all!)
So today we made dandelion pancakes. I looked for a recipe on Aviva Romm’s website but could not find one, so I turned to trusty Google and found these two:
We decided to try the recipe from Wintergreen Farm first. This recipe calls for 6 to 8 cups of dandelion blossoms. That is a lot of dandelion petals! Picking all of the petals off of that many dandelions took a really long time. Cowgirl and I sat and picked them all off, Princess helped a little. We sat outside in the sunshine (finally some sunshine!!) and listened to one of our new favorite podcasts:Eleanor Amplified
Cowgirl, Tank and Monkey liked the pancakes, Princess tolerated them (with a lot of jelly on top), I did not mind the flavor, but I could not handle the texture, there were a lot of petals.
We may try the other recipe, (there are fewer petals in that one) we may not, it depends on whether or not the kids ask me to make them again.
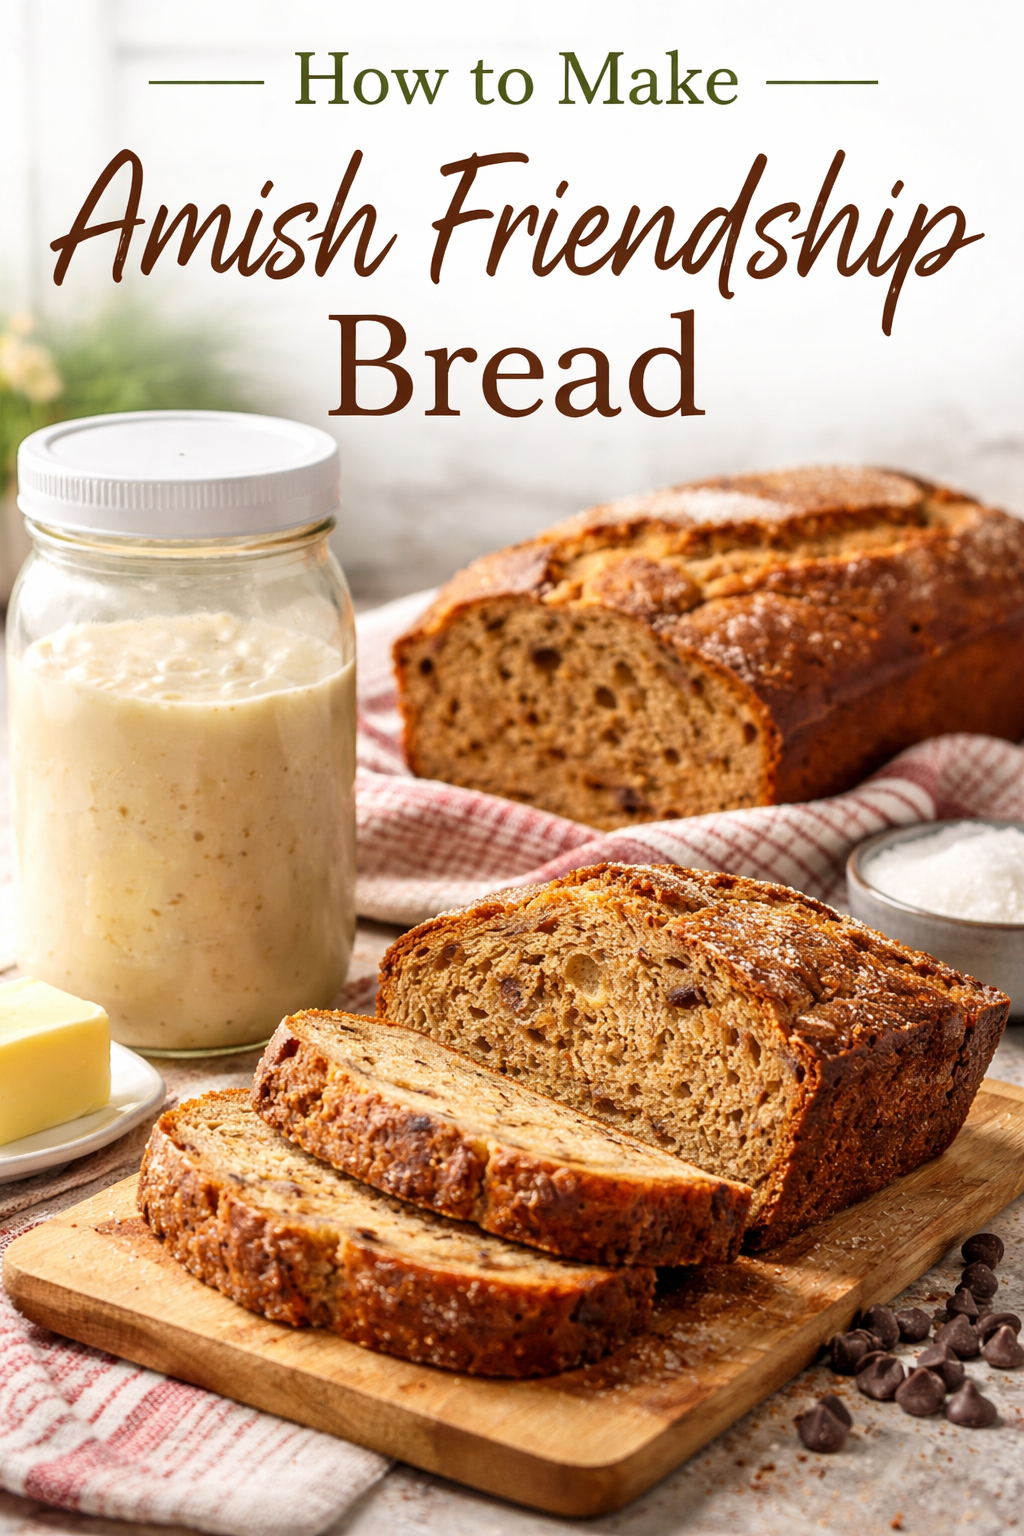
My family absolutely loves Amish Friendship Bread. It’s a delicious sweet bread that is always a crowd-pleaser.
A friendship bread starter is a wild-yeast culture, similar to sourdough, but it’s fed with flour, sugar, and milk rather than the traditional flour-and-water mixture used for sourdough. Because it’s sugar-fed, it’s used for sweet breads instead of tangy sourdough loaves.
It takes 10 days to get a starter going, and once it’s established, you can bake a new batch of bread every 10 days if you keep feeding it.
To make your own starter begin by mixing 1 cup flour, 1 cup sugar, and 1 cup milk in a glass container. You can use a plastic container, but metal is not recommended for storage because some metals will react with the acid in the starter and cause the flavor or color to change. Stirring with a stainless steel utensil is fine. I like to use an old Adams Peanut Butter jar with a plastic lid. I like these jars because they are glass and have a nice, wide mouth. A wide mouth quart jar will also work, or a glass bowl with a lid.
10 Day Schedule
Day 1: mix 1 cup flour, 1 cup sugar, 1 cup milk
Days 2-4: stir
Day 5: add 1 cup flour, 1 cup sugar, 1 cup milk
Days 6-9: stir
Day 10: add 1 cup flour, 1 cup sugar, 1 cup milk. Baking Day!!
Since you added ingredients on Day 10 this now becomes Day 1 of the cycle for your remaining starter.
On baking day, after feeding your starter with flour, sugar and milk, use 1 cup of the starter to make your bread. Save at least 1 cup of starter for yourself, to continue your bread-making cycle. Divide the rest of the starter into 1 cup portions and give it to your friends with a loaf of bread, instructions on caring for their starter, and the recipe so they can make their own bread in 10 days. Thus the title Friendship Bread!
People often get turned off to Friendship Bread because they end up with so much starter, and no friends left to give it to. There are a couple of ways to solve this problem:
1. Double, triple, or quadruple your recipe to use up more of your starter (saving 1 cup for your next 10 day cycle, of course). This is great if you have a party or get together planned and you want to stock up.
2. Don’t make so much starter. Instead of adding 1 cup of everything just add 1/2 cup. That way on baking day you have just enough to take one cup for baking and leave some starter to begin the next 10-day cycle.
3. Starter can be kept in the fridge for a while if you want to take a break, but still have some starter left. I’ve kept it in the fridge for as long as two months. (I try to remember to stir it once a week and occasionally add a tablespoon or so of flour, sugar, and milk, just to keep the starter active.)
4. I’ve made this bread with whole wheat flour or all-purpose flour and it tastes great either way.
I like to add raisins, my husband likes to add chocolate chips, and my mother-in-law adds grated carrots. All variations taste good, and it’s great with frosting too. Friendship Bread is great to slice up and serve at parties. I usually keep some in the freezer for unexpected company. It freezes beautifully and even tastes good straight from the freezer.
P.S. I have discovered that this works well in the bread maker, I put mine on the ‘Sweet Breads’ setting and set the crust to medium. The recipe normally makes 2 loaves, but when I use the breadmaker I put all of it in to make a bigger loaf. This works well on the days that I need to make bread but don’t want to heat up the whole house, or just don’t have the time. If you’re using the breadmaker though, you might want to leave out the chocolate chips and other additions, we’ve discovered that it doesn’t cook right with the extras added.