For any of you that have a flannel board and enjoy making story and play sets to go on it I’ve got a little tip for you.
Buy 15 inch circle non-gauze milk filters, a box of 100 costs about $15 including shipping. You can get them here.
Trim them to 8.5×11 inches.
I use my quilting square and a sharpie to make my rectangle
Then cut them out. I usually hold 2 or 3 together and cut them all out at the same time, or use my rotary cutter to cut through several sheets at once.
Run them through your printer.
Cut out the pieces. They stick right to flannel, felt, fleece, and each other!
I got these awesome printable shapes from MrPrintables.com, you can download your own here.
I have also printed out just the outline and then colored it in with crayons, colored pencils, and markers, they all work really well.
These are thin for easy storage, and they are super durable. I have made several sets for my girls and they play with them a lot, I have yet to have one of them tear.
I’ve been wanting to make a flannel board for my girls for a few months now, but I was having a hard time deciding how I was going to do it. I started doing some research and found lots of different methods – you can glue the flannel to cardboard, foam display boards, plywood, pretty much anything with a flat surface.
I originally saw this idea on the blog Oopsey Daisy, which no longer appears to be active. She shared how she made a flannel board on the back of a magnetic dry erase board, creating 3 activities in one. Making good use of our limited space seemed like a great idea to me. I had a hard time deciding what size board to use, and then finding one that I liked. I wanted something with rounded corners that was large enough for storytelling and small enough to tuck away when not in use. I found the perfect board on clearnence at Walmart. I grabbed some light blue flannel and got started as soon as I got home. This was a fast project, start to finish it took me about half an hour.
Since the original tutorial is missing, I’ll try to give you a quick summary of what I did. The back of the board was not flush with the frame, it had a raised edge that was not going to work well with what I wanted. I found some extra cardboard, cut it to the same size as the board and attached it to the back of the dry erase board to make a flat surface that was even with the edge of the frame, then I stretched the flannel over the board and used a hot glue gun to secure the edges. One thing that I wish I had done differently is I wish I had folded the edges over a little and then secured them so that the cut edge of the fabric is tucked under. I left the raw edges of the fabric exposed and they are starting to fray a little, not a problem, just not very pretty.
This is what my finished product looks like:
As you can see, I chose to use a light blue flannel, I feel that it’s a good neutral color.
And this is the dry erase board side. This board is 23″x17″. I originally wanted to buy one that was about twice this size, and I’m so glad that I didn’t. This board is the perfect size, doesn’t take up too much room and is completely portable. I’ve already made a couple of stories for it, based on two of our favorite books, and it’s a big hit! My girls beg for me to tell them stories on the flannel board, and they have the stories nearly memorized. Sometimes when they are playing I hear them retelling the stories to each other or their toys. I love that.
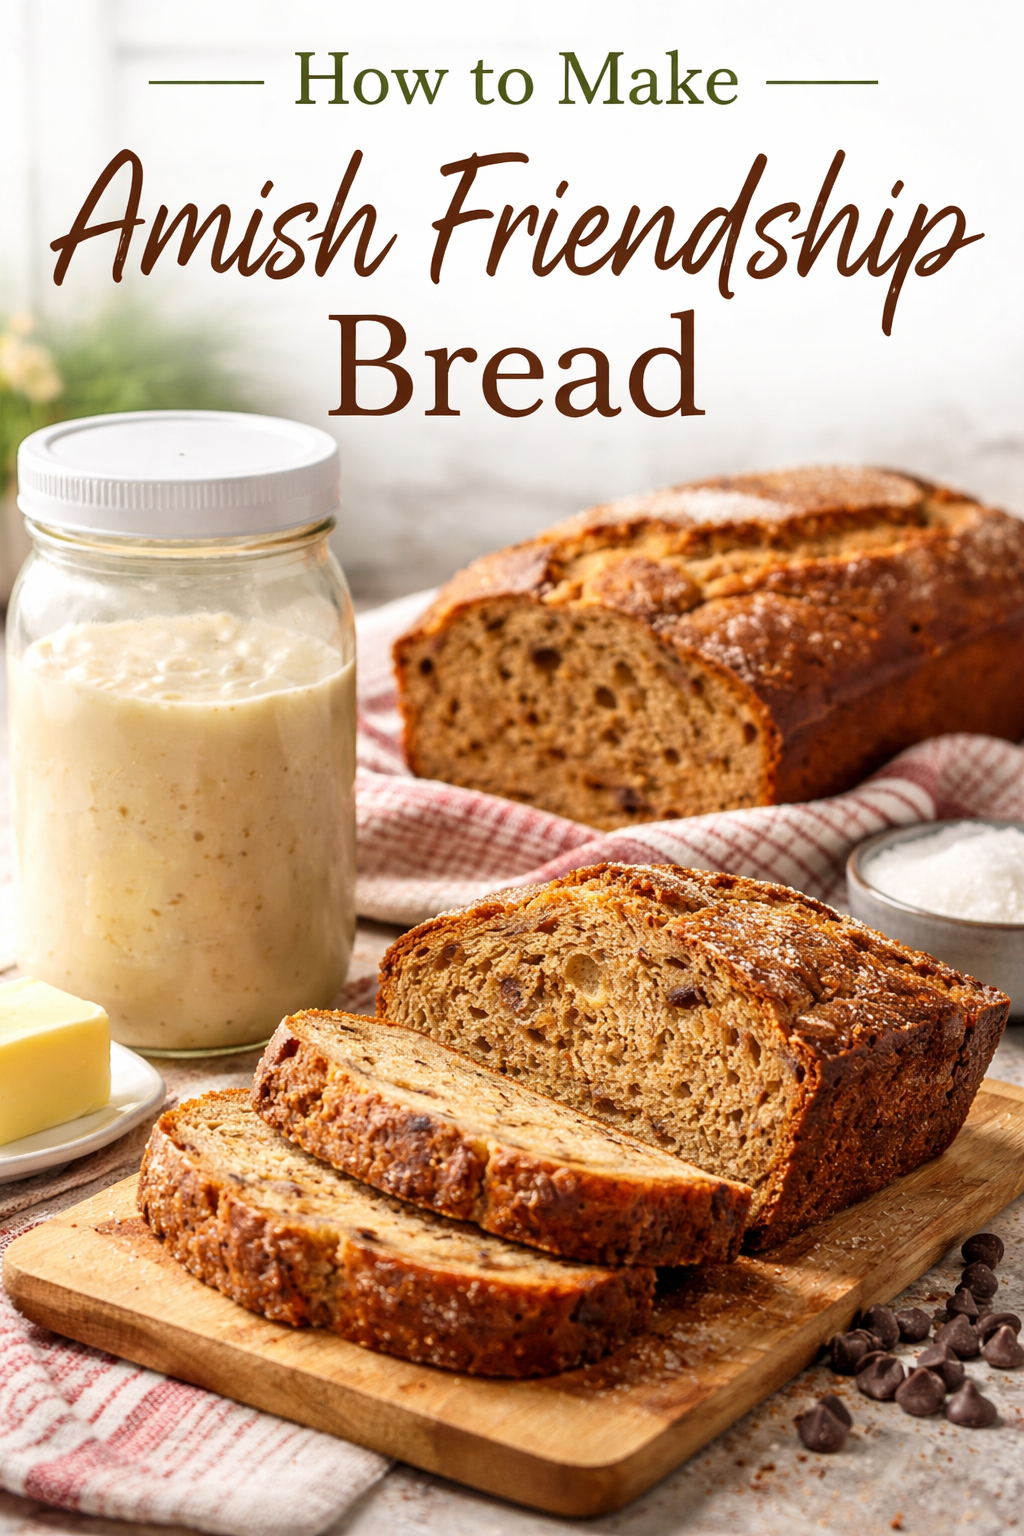
My family absolutely loves Amish Friendship Bread. It’s a delicious sweet bread that is always a crowd-pleaser.
A friendship bread starter is a wild-yeast culture, similar to sourdough, but it’s fed with flour, sugar, and milk rather than the traditional flour-and-water mixture used for sourdough. Because it’s sugar-fed, it’s used for sweet breads instead of tangy sourdough loaves.
It takes 10 days to get a starter going, and once it’s established, you can bake a new batch of bread every 10 days if you keep feeding it.
To make your own starter begin by mixing 1 cup flour, 1 cup sugar, and 1 cup milk in a glass container. You can use a plastic container, but metal is not recommended for storage because some metals will react with the acid in the starter and cause the flavor or color to change. Stirring with a stainless steel utensil is fine. I like to use an old Adams Peanut Butter jar with a plastic lid. I like these jars because they are glass and have a nice, wide mouth. A wide mouth quart jar will also work, or a glass bowl with a lid.
10 Day Schedule
Day 1: mix 1 cup flour, 1 cup sugar, 1 cup milk
Days 2-4: stir
Day 5: add 1 cup flour, 1 cup sugar, 1 cup milk
Days 6-9: stir
Day 10: add 1 cup flour, 1 cup sugar, 1 cup milk. Baking Day!!
Since you added ingredients on Day 10 this now becomes Day 1 of the cycle for your remaining starter.
On baking day, after feeding your starter with flour, sugar and milk, use 1 cup of the starter to make your bread. Save at least 1 cup of starter for yourself, to continue your bread-making cycle. Divide the rest of the starter into 1 cup portions and give it to your friends with a loaf of bread, instructions on caring for their starter, and the recipe so they can make their own bread in 10 days. Thus the title Friendship Bread!
People often get turned off to Friendship Bread because they end up with so much starter, and no friends left to give it to. There are a couple of ways to solve this problem:
1. Double, triple, or quadruple your recipe to use up more of your starter (saving 1 cup for your next 10 day cycle, of course). This is great if you have a party or get together planned and you want to stock up.
2. Don’t make so much starter. Instead of adding 1 cup of everything just add 1/2 cup. That way on baking day you have just enough to take one cup for baking and leave some starter to begin the next 10-day cycle.
3. Starter can be kept in the fridge for a while if you want to take a break, but still have some starter left. I’ve kept it in the fridge for as long as two months. (I try to remember to stir it once a week and occasionally add a tablespoon or so of flour, sugar, and milk, just to keep the starter active.)
4. I’ve made this bread with whole wheat flour or all-purpose flour and it tastes great either way.
I like to add raisins, my husband likes to add chocolate chips, and my mother-in-law adds grated carrots. All variations taste good, and it’s great with frosting too. Friendship Bread is great to slice up and serve at parties. I usually keep some in the freezer for unexpected company. It freezes beautifully and even tastes good straight from the freezer.
P.S. I have discovered that this works well in the bread maker, I put mine on the ‘Sweet Breads’ setting and set the crust to medium. The recipe normally makes 2 loaves, but when I use the breadmaker I put all of it in to make a bigger loaf. This works well on the days that I need to make bread but don’t want to heat up the whole house, or just don’t have the time. If you’re using the breadmaker though, you might want to leave out the chocolate chips and other additions, we’ve discovered that it doesn’t cook right with the extras added.